Black White and Gold Bathroom Remodel: Personal
- jasminenorris

- Oct 27, 2020
- 8 min read

Are you guys ready to see our upstairs bathroom remodel?!?!?! If you follow me on Instagram, you will know how long we've been working on this project and I am SO EXCITED that it is finally done!!!! We purchased our house almost 7 years ago. It's a 110+ year old Stick Style Victorian House and we've been slowly improving and fixing it up. We did a lot of the major stuff right away but one project that we kept putting off was the upstairs bathroom. When we moved in, we kind of gutted it and left it like that and have been using the downstairs bathroom all this time.
Since our house is a historic home, we really try to keep all of the historic accents and features that our house still has. I LOVE the original features and it's just not our style to paint everything white and put ship-lap on everything (if that's your style, I'm not knocking that, it's just not for us). This upstairs bathroom had already been renovated a few times when we bought the house so even though it looked old/dated, it wasn't original. Even the shape of the room was something that was altered at some point in time. It would have been part of another room upstairs which was probably a parlor. Since the original accents and feel of the room had long been stripped away, I was super excited to fully redo this room and make it more modern!
I do want to say that we can't take all the credit for this remodel. While I did all of the design for the bathroom and Devin and I both did a lot of work, we did hire our friend Zach to do the plumbing work and our friend Brandon to do the plaster removal/leveling/drywall/tile.
Keep reading between the photos to learn more! I'll also link some of the items we purchased at the end if you are interested in them!

The above photo is a photo that was part of one of the listings for our home before we bought it. This photo was taken a few sellers before us so it was in even worse shape when we got the house.

The three photos above are when we were doing one of the walkthroughs of the house before we bought it. It was being used as a rental at this time and this was the main bathroom. As you can see, the wallpaper was pealing and missing in some spots. The shower and tub were in bad shape as well and there was a few layers of carpet!

Devin and I tore out the carpet once we moved in to make it a bit cleaner but other than that we left everything else. Once we FINALLY decided to move forward with the remodel, Devin tore out the old shower (that is now the linen closet) and we got the tub out.
We really wanted to keep the cast iron tub! I'm not sure if it was original or not but we really wanted to re-finish it and keep it BUT we needed more space in our bathroom and there was no way to get it out of the door and our house without, sadly, having to smash and destroy it. It does make me sad that we weren't able to keep it but I'm so happy for the way that our bathroom turned out so it was worth it.

And so the demo begins! Brandon tore out all of the old plaster and put up new drywall.
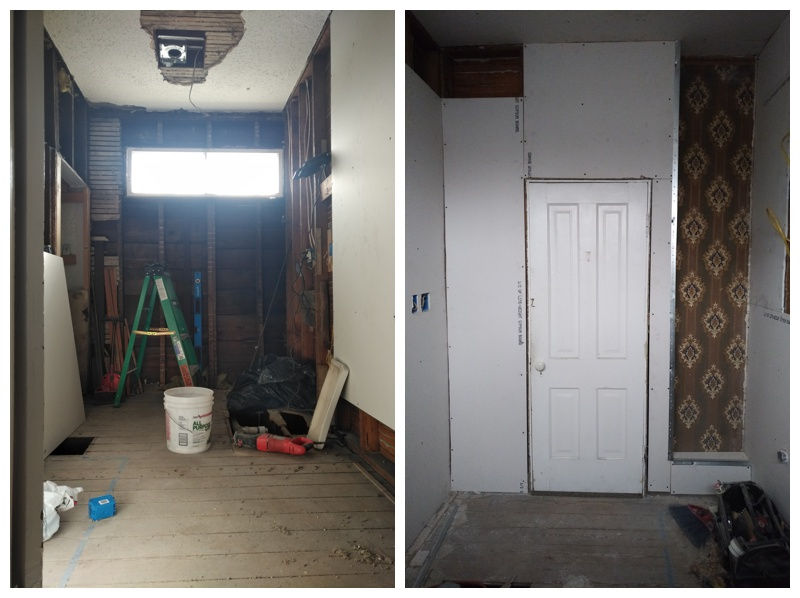

Once Brandon took out most of the drywall, I noticed that there was this section of the room that had some original hand painted wallpaper!!!! It was preserved pretty well since it was left under the slats that someone installed during some other remodel. If you look at the second photo, there was two other types of wallpaper as well in different areas but they were newerish and were plastered over where we couldn't save them. However, I had Brandon save the hand painted wallpaper area and frame it out because I did not want to hide or destroy this amazing hand painted wallpaper and we ended up turning it into a featured shelf area! This, honestly, has to be 110+ years old and original to the house. Now I wonder how the rest of the house was wallpapered because if this was upstairs, the downstairs receiving rooms had to be pretty spectacular!

I mean, just look at those details and gold accents!!!!

Next it was time to waterproof the shower area and then lay down the tile. It took me forever to find the right tile for the shower but we finally found it!

This tile can actually be placed into several different patterns. I originally wanted a pattern that was more art deco but Devin hated it and really wanted the triangle design so that's what we went with. He let me have pretty much all the other design choices so I figured I could let him have that!

One the drywall was up, tile was on, and trim got put up, it was time to paint and start moving stuff in. Devin and I painted everything and put up the closet and some of the trim.

Another detail about our floor tile is that we used glitter grout! Glitter grout is bigger overseas and hasn't really made it's way here yet but we love it! The photo does not do it justice at all and it is super pretty in person! We used charcoal grout so we went with a black holographic glitter grout additive and it turned out perfect!
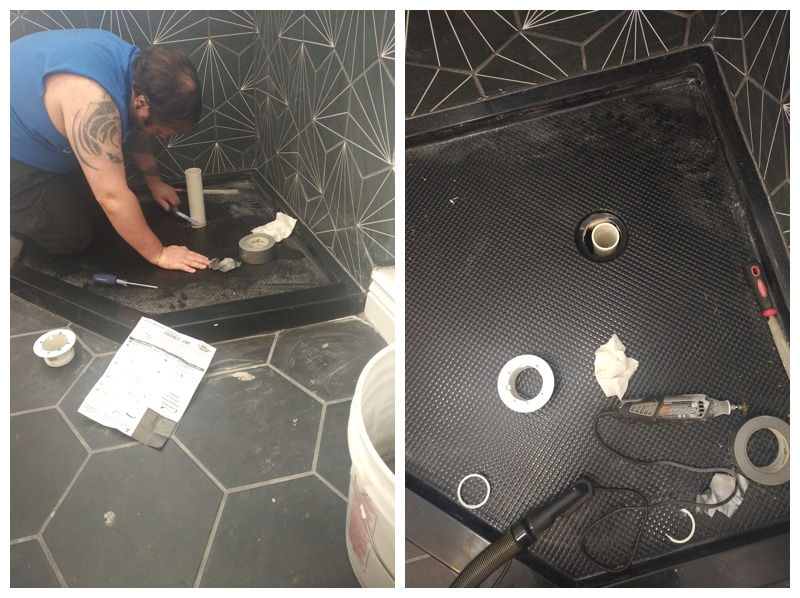
We ran into a few hiccups in the bathroom remodel and one of those hiccups was that the shower basin got installed before the drain was put on. The only way to remedy this was to either tear out the shower basin or tear out the ceiling in the dining room so the drain could be installed from underneath. Both of those options obviously were not the best! I did some research and found a drain that could be installed from the top (it was more for if someone's drain failed and needed to be replaced, they could use this). We took a gamble on it but it worked perfectly! Devin and I had to do some adjustments but we got it in!

For us to fit everything into our bathroom the way we wanted it, we couldn't use a normal door. The door also would have had to open into the bathroom because the hallway outside the bathroom wouldn't allow a door to open out. Our only solution was to put on some sort of barn door system. Now, I don't hate barn doors but for our style and house, barn doors don't really fit. I did some searching and found these doors that weren't as rustic and that kind of matched the style of the rest of the doors in our home and they worked perfectly!

And now... ta-da! The finished project!!!!!

I filled the linen closet with white, black, and gold bins to keep our extra toiletries and things hidden and more organized.


I know you may be wondering, "why do you have mannequins in your bathroom?!?!". Devin and I like to add some fun elements to every room of our house. I also, oddly, have a fascination with mannequins and we have 6 of them in our home that I've collected over the years. I thought these two would be perfect for our bathroom! They were originally white and silver so I spray painted the base gold and the body black. We are also going to add some gold foil splatters to the black bodies as well!

I got some cute black bottles and labels so our shampoo, conditioner, and body wash will look cute in the shower!

Let me tell you, finding the perfect gold elements for our bathroom was a struggle! I really wanted gold elements throughout but apparently most people like silver/chrome because gold was hard to come by. I LOVE this Pfister rain shower head and handle that I ended up finding and it fits perfectly!
For the light/exhaust, there are NO cute gold options AT ALL! Like no one makes gold accented exhaust fans. If you need a business idea, there you go, pretty light/exhausts! I found this pretty white marbled light/exhaust but it had silver accents instead of gold. However, it was very easy to remove those silver accents so I just spray painted them with an outdoor gold paint and it looks marvelous!

I told you we like kooky/wacky things, right?!?! Meet our lion toilet paper holder! We spent WAY too much money on him but he is perfect!
I found these amazing light fixtures and outlets that fit our bathroom and the Victorian feel of our house perfectly! These weren't expensive but quite a bit more than normal covers but they are 100% worth it and they are so strong and heavy! They are not made out of that plastic stuff. We are planning to buy more of these for the rest of our house!
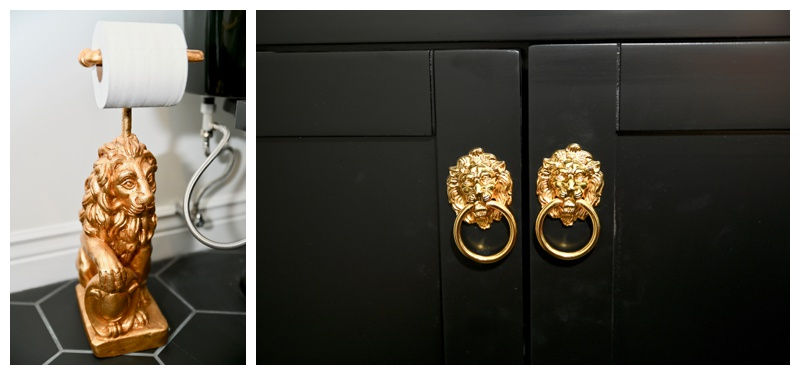
To go along with our lion toilet paper holder, I added gold lion rings to the doors of our vanity to tie everything together!

Just like exhaust lights, gold bathroom faucets are hard to come by too! They have them but they are either ugly or $2000-$5000 and I wasn't going to pay that much for faucets. I found these ones on Amazon for super cheap. I wasn't 100% sold on the style but Devin loved them. It was a risk buying them but they ended up being super strong and perfect!

I also found these ceramic, gold, and crystal toothbrush holder, toilet brush, and towel rings. They fit out design perfectly and I loved the nod to Versace with the gold banding. I splurged on a Versace bath rug so these really tied everything together nicely.


The vanity we picked out came with all silver pulls so I changed them all out for gold pulls.

Love these mirrors and the hexagon lights!
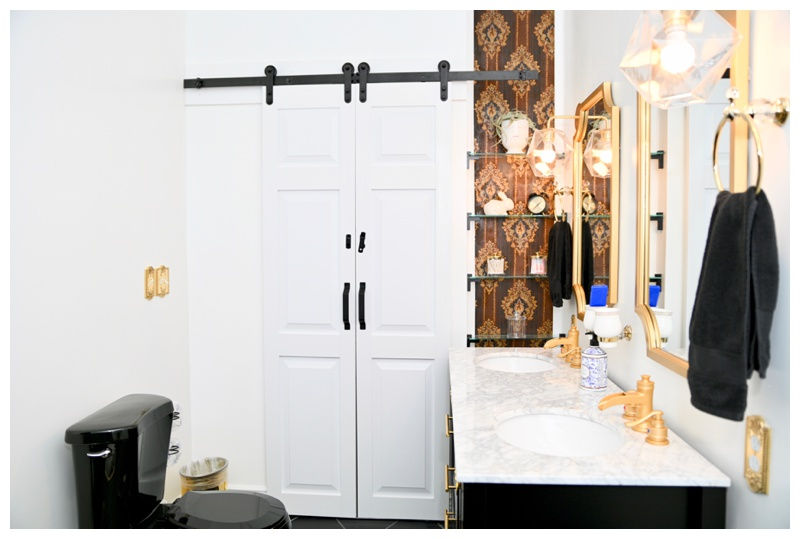

We got new black towels for this bathroom to continue in with the design. Black towels are also a bit hard to find (apparently people don't do black and gold bathrooms?!?!) but I found these at Neiman Marcus.


Seriously in love with our feature shelf area with the original wallpaper! Once we unearthed it, I cleaned it up and then sprayed some clear protectant spray on it to keep it looking great and so it would resit any moisture.
Our shelves were custom from Lafayette Glass and I bought the shelf supports so we could attach them to the wall and not the wallpaper to further protect the wallpaper.


Lastly, I shopped around like crazy to find the best deals on the products that we wanted so we could stick within budget BUT I just had to splurge on this Versace bath rug! I'm all about making your home a place you love and for me, sprinkling around a few of my favorite designers in each room just makes me happy!

That's it! I hope you enjoyed our bathroom remodel! If you want to see more of our home improvements/remodel, click the "home improvement" category below!
Products used (links may be affiliate links):
Over The Toilet Toilet Paper Holder: https://amzn.to/2G05XvS
Lion Toilet Paper Holder: https://amzn.to/3e36dXx
Shelf Brackets: https://amzn.to/2G06aPG
Bunny Cotton Ball Holder: https://amzn.to/3otYdDN
Barn Door Latch: https://amzn.to/3mvrWut
Towel Hooks:https://amzn.to/3krsMrn
Storage Canisters: https://amzn.to/2J9DTaI
Toiletry Bottles: https://amzn.to/3mqjfRS
Drop In Shower Drain: https://amzn.to/3jwvzhR
Glitter Grout Additive: https://amzn.to/3jAr3i1
Lion Head Cabinet Pulls: https://amzn.to/3e1pDMk
White/Gold Storage Bins: https://amzn.to/31JLZgI
Light Switch Plate: https://amzn.to/34vPngN
Outlet Plate: https://amzn.to/2TtJaf0
Sink Faucet: https://amzn.to/3jxipB8
Exhaust Light/Fan: https://amzn.to/3owmA3V
Mirrors: https://amzn.to/35z60aJ
Full Length Mirror: https://amzn.to/2J8dASi
Towel Rings: Out Of Stock
Toothbrush Holder: Out Of Stock
Toilet Brush: Out Of Stock
Vanity Pulls: https://amzn.to/3orNrOx
Floor Tile: https://amzn.to/3ozPU9J
Vanity: https://amzn.to/3mxcihR





Comments